
Wenda Electronics
Choosing the best wire connector in 2026 requires more than comparing prices or package counts. Buyers need dependable performance in real installation conditions.
A Wire Electrical Connector must match the conductor size, material, current load, temperature range, and surrounding environment. A connector used inside a dry control cabinet may fail outdoors without weather protection. Moisture, vibration, corrosion, and repeated movement can quietly weaken a connection. Small details matter.
This guide compares common connector types, including wire nuts, crimp terminals, lever connectors, push-in connectors, and waterproof heat-shrink options. It explains where each design works well and where it creates practical limitations. We also examine insulation quality, contact materials, locking methods, tool requirements, and compatibility with copper or aluminum conductors. The analysis follows manufacturer datasheets and recognized safety requirements, such as applicable UL or IEC standards, rather than relying on attractive product claims.
Field experience shows that installation quality often matters as much as connector design. A correctly rated connector can still overheat when the wire is loose, poorly stripped, or inserted beyond its limit. Check the connection. Pull it gently. Inspect exposed copper. Use the recommended crimping tool or torque value when specified.
Some listings remain unclear.
That is a concern.
Buyers should verify certifications, temperature ratings, wire ranges, ingress protection, and replacement availability before ordering. Product reviews can reveal useful handling problems, but they cannot replace technical documentation. This guide aims to support careful decisions, while recognizing that no single connector fits every project. In practice, the safest choice may be less convenient, more expensive, or simply different from the most popular option.
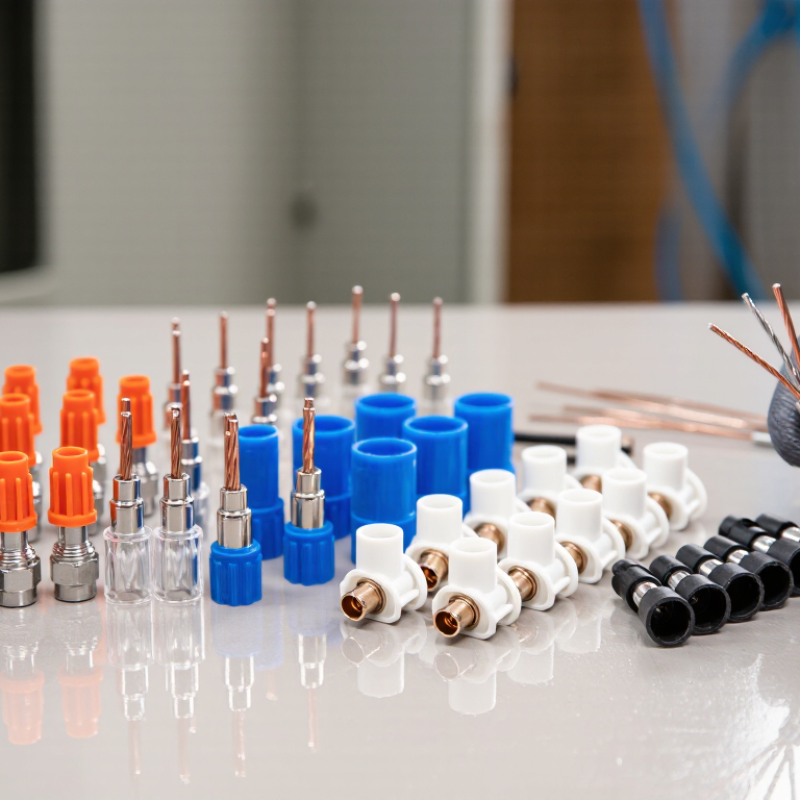
Wire electrical connectors join conductors to carry power or signals while helping maintain a stable electrical path. Common types include twist-on connectors, push-in connectors, crimp terminals, and terminal blocks. Each secures wires differently. A twist-on connector grips stripped wire ends inside an insulated cap, while a crimp terminal deforms around a conductor when compressed with a suitable tool. Push-in connectors use internal springs, and terminal blocks hold wires with screws or clamps. Small details matter: wire size, strand type, insulation condition, and the connector’s rated current all affect fit and performance.
The core function is more than keeping wires together. A sound connection limits resistance, reduces unwanted heat, and helps prevent conductors from loosening under vibration. It also provides insulation or a barrier against accidental contact, depending on its design. No connector suits every job. A crimp terminal may work well in a compact assembly, but a poor crimp can leave strands loose. That part is easy to underestimate. Check the connector’s markings and instructions, then match them to the wire and application. For mains or other hazardous circuits, use a qualified professional.
Tips: Strip only the length specified by the connector maker. Keep copper strands intact and fully seated. After assembly, gently tug each wire; movement may signal a weak connection. A visual check helps, but it cannot prove electrical performance. Use the correct crimping or tightening tool, and replace connectors that are cracked, corroded, or heat-discolored.
A connector’s material affects resistance, corrosion behavior, and heat at the joint. Copper offers high conductivity; tin plating can help limit surface oxidation. Aluminum connections need compatible connector designs and careful preparation. Small details matter. A loose strand under a screw can create a hot spot, even when the connector appears secure.
Compare published ratings, not appearance. IEC 60228 lists a maximum resistance of 12.1 ohms per kilometer for a 1.5 mm² copper conductor at 20°C in its specified conductor classes. That figure describes the wire, not the connector’s allowable current. UL 486C evaluates wire connectors for specified conductor combinations and conditions. Check the product’s listed wire range, temperature rating, and installation method against the actual circuit.
Design changes installation quality. Screw terminals allow inspection and retightening where permitted; spring-clamp types can reduce dependence on tightening torque. Crimp connectors require the correct tool and die. Fit matters. Compare rated current only under stated wire sizes, ambient temperatures, and enclosure conditions. A published rating is not universal. I would also inspect a sample joint after assembly, because real-world wire routing can pull harder than a tidy bench test suggests. That check is useful, but it does not replace the connector’s listing or installation instructions.
Wire connectors are not interchangeable, even when they look similar. For residential wiring, twist-on connectors are common for joining compatible copper conductors inside approved electrical boxes. Push-in connectors can speed up work, but wire size, conductor material, and the connector’s rated use must match. A neat connection matters. Loose or mismatched conductors can overheat.
Commercial buildings often use lever-style or terminal-block connectors where circuits need organized, repeatable connections. They can be useful in lighting controls, equipment panels, and spaces with frequent maintenance. Check the product markings for wire range, temperature rating, and whether solid or stranded conductors are permitted. Labels are easy to overlook. They should not be.
Industrial environments bring vibration, moisture, dust, and heavier loads into the picture. Crimp connectors, compression terminals, and sealed connectors may suit specific equipment connections, provided the tools and installation method match the connector design. A crimp that looks firm may still be poor inside. That is worth remembering. Select connectors based on the actual conductor, enclosure, and operating conditions, then follow the manufacturer’s instructions. When the application is uncertain, a qualified electrician can verify the choice before power is applied.
A connector is safe only when it matches the conductors and the conditions around them. Twist-on connectors suit many household splices, while push-in or lever-style connectors can simplify work in approved enclosures. Crimp connectors and terminal blocks serve different equipment and wiring layouts. The label matters more than the shape. Check the listed wire material, gauge range, solid or stranded construction, voltage, temperature rating, and permitted number of conductors. Small details matter.
Before installation, switch off the circuit and verify that it is de-energized with a suitable tester. Strip each wire to the length specified by the connector maker; exposed copper should not extend beyond the housing. Seat conductors fully, tighten screws to the stated torque, and give each wire a gentle pull. It is easy to rush this step. A loose splice can heat up under load, even when it looks tidy.
Never assume copper and aluminum wires can share a connector. Use only a connector specifically listed for that combination, and follow its preparation requirements. Keep splices inside an approved electrical box with the required cover and space. Local electrical codes and product certifications differ, so check the rules that apply to the installation. If the conductor type, circuit load, or enclosure is uncertain, pause and consult a qualified electrician. Compatibility is not always obvious.
How to Choose the Best Wire Electrical Connector for 2026 Projects
Choosing a wire connector starts with the project environment, not its appearance. In residential panels, terminal blocks and push-in connectors can provide neat, serviceable connections. Crimp connectors suit vehicles, control cabinets, and applications exposed to vibration. For outdoor equipment, use sealed connectors with suitable insulation and strain relief. Moisture changes everything.
Match the connector to the wire gauge, conductor material, voltage, current, and temperature range. Check the manufacturer’s technical data and required installation method. A connector rated for copper may not accept aluminum conductors safely. Also inspect the circuit’s fault conditions, enclosure space, and expected maintenance access. Small details matter.
I have seen tight-looking connections fail because the wire was only partly inserted. They looked fine. A calibrated crimping tool, correct stripping length, and a gentle pull test improve reliability. For screw terminals, verify torque with the specified tool instead of guessing. That habit is easy to skip. It can also prevent overheating.
Projects planned for 2026 may include sensors, compact power supplies, and frequent service changes. In those cases, choose connectors that support clear labeling and repeated inspection. Avoid selecting the cheapest type when replacement access is difficult. I still reconsider this rule for temporary prototypes, where quick changes may matter more than long-term durability. Always verify applicable electrical standards before installation.
| Connector Type | How It Connects | Typical Applications | Key Advantages | Limitations and Checks | Best Fit When... |
|---|---|---|---|---|---|
| Twist-on wire connector | Conductors are twisted together inside an insulated cap that grips the joined wires. | Building wiring and junction-box splices, where the connector is listed for the conductor types and sizes used. | Compact, widely used, and requires no separate crimping tool. | Follow the connector’s wire-combination chart and installation instructions. The splice must be enclosed in an approved box or enclosure where required. | You need a conventional enclosed splice and can match the wire combination to the connector’s listed range. |
| Push-in spring connector | A spring mechanism holds a conductor inserted into an individual port. | Lighting circuits, fixture connections, and other installations permitted by the connector’s listing. | Fast installation and a compact, tool-light connection method. | Many models are limited to specified conductor types, often solid wire. Check the permitted gauge, conductor material, strip length, and whether reuse is allowed. | Speed and a neat layout matter, and the conductor type and size match the product instructions. |
| Lever-operated spring connector | A lever opens a spring clamp; closing it secures the stripped conductor. | Fixtures, control wiring, maintenance access points, and mixed solid or stranded conductors when specifically permitted. | Convenient to inspect and disconnect; conductor compatibility can be broader than with some push-in designs. | Confirm the listed wire range, conductor type, voltage and current ratings, and enclosure requirements. Do not assume every model accepts every wire type. | Connections may need inspection or servicing, or the job uses conductor types supported by the connector. |
| Crimp butt splice | A metal barrel is crimped around two conductors to make an inline splice. | Automotive, appliance, equipment, and other wiring harnesses using a splice suited to the environment. | Creates a compact inline joint and can provide a durable connection when correctly matched and crimped. | Use the specified wire range and a compatible crimping tool and die. Insulation, sealing, and environmental ratings vary by design. | You need to join conductors end-to-end and can make the crimp with the correct tooling. |
| Ring or spade crimp terminal | A crimp barrel attaches a conductor to a ring-shaped or fork-shaped terminal for a screw or stud. | Battery leads, grounding points, control panels, and equipment terminals designed for lug connections. | Provides a direct attachment to a stud or screw; a ring terminal resists slipping off when the fastener is loosened. | Match the wire range, stud size, terminal material, and crimp tool. A spade terminal can be removed without fully removing the fastener, but may be less secure against dislodgement. | The wire must attach to a threaded post or terminal screw. |
| Screw-clamp terminal block | A screw presses a clamp or plate against the inserted conductor. | Control panels, equipment wiring, and organized multi-circuit terminations. | Allows orderly wiring and can make individual conductors accessible for maintenance. | Observe the block’s wire range, conductor type, strip length, and specified tightening torque. Use ferrules only where permitted by the terminal manufacturer. | You need a structured termination point for multiple circuits or serviceable equipment wiring. |
| Insulation-displacement connector (IDC) | Contact blades pierce or displace insulation to contact the conductor, usually without stripping it first. | Specified signal, data, lighting, or low-voltage wiring systems designed for IDC connections. | Can simplify repetitive connections and reduce individual wire-stripping steps. | Use only with the specified conductor size, construction, insulation, and installation method. It is not a universal substitute for a power-wiring splice connector. | The wiring system expressly calls for an IDC connector and the cable matches its specifications. |
| Sealed heat-shrink butt splice | A crimped inline splice is covered by heat-shrink tubing, often with an internal sealant layer. | Vehicle, marine, outdoor, or equipment wiring where the splice needs environmental protection and the product is rated for the application. | Can help protect a correctly made crimp from moisture and contamination. | Sealing depends on the connector design and correct crimping and heating. Verify the environmental, temperature, voltage, and wire-size ratings; “sealed” does not mean suitable for every submerged or hazardous location. | The splice is exposed to moisture or contamination and a suitably rated sealed connector is specified. |
Selection note: Choose connectors by conductor material and type, wire size, voltage and current, temperature, environment, and applicable listing or code requirements—not by connector style alone. Use products specifically rated for aluminum conductors when working with aluminum, and follow the product instructions and local electrical requirements.
Material affects electrical resistance, corrosion, and heat at the joint. Copper conducts well, while tin plating can help limit surface oxidation.
No. A conductor resistance figure does not establish a connector’s allowable current. Check the connector’s listed ratings and conditions.
Check the approved wire sizes, conductor materials, temperature rating, and installation method. Ambient temperature and enclosure conditions matter too.
Screw terminals allow inspection and may permit retightening. Spring clamps reduce reliance on tightening torque. Crimp connectors need the correct tool and die. Fit matters.
Only if the connector is specifically listed for that combination. Follow its preparation instructions carefully.
With the circuit de-energized, confirm the wires are seated, tighten screws to the specified torque, and give each wire a gentle pull. A tidy appearance proves little.
Strip each wire to the length specified for that connector. Exposed copper should not extend beyond the housing.
Keep them inside an approved electrical box with the required cover and space. Requirements can vary by installation.
Pause and consult a qualified electrician. Connector labels can be easy to misread, and a sample joint cannot replace listed instructions.
Choosing the right Wire Electrical Connector in 2026 means matching its design, material, and current rating to the demands of the project. Connectors join conductors securely, support reliable electrical continuity, and help protect connections from loosening or environmental exposure. Common options include twist-on, push-in, crimp, terminal-block, and mechanical connectors, each suited to different wire sizes, installation conditions, and residential, commercial, or industrial applications.
Before selecting a connector, check conductor material and gauge, rated voltage and current, temperature limits, and compatibility with the enclosure and wiring method. Follow applicable safety standards and the manufacturer’s installation instructions, using the correct preparation and fastening method for the connector type. Comparing these factors helps buyers choose a connector that is practical to install, appropriate for the environment, and reliable throughout the service life of the project.
